Mapping
I have been very lazy with updates, so a well deserved big update on the car!Myself and Jay headed up to the dyno to see how the car was doing, but on the day as always happens there was a problem... with my boost controller. So we couldn't map on the way up. Once we got there I found and repaired a power wire that had pulled free from a crimp and all was well with the controller, or so we thought.
The next issue was if it would get on the rollers (as the diffuser is rather low)! Luckily it did and I then managed to break Jay's Datalogit plug! I thought I was all out of luck then Dale came to the rescue as he had one in the van, thanks!
Jay jumped in the car and we did a few runs, but there was too much wheelspin so we all climbed in the boot for more grip and to my astonishment we got a massive 650hp with 500ft/lb of torque!
But... it was slow to build boost and it fell off too soon at the top end which Jay says is due to the boost controller. I am going to check the spring in the waste gate and also the lines to the waste gate as it could be one has a small leak.
Even so I'm really pleased with what we got, and there will be more to come soon... once the boost controller is setup we will re-run on the dyno and post up a graph. Cheers Jay for the build and your help!
Here is a video of the run I edited on my phone: Video of the dyno run


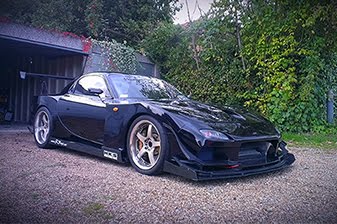
Custom canards and splitter
Since I didn't make the pod due to man flu I thought I'd update the build thread!After all of the engine and suspension modifications I hadn't focused on the aero since adding the rear wing. I'd also damaged my front splitter, After all of the engine and suspension modifications I hadn't focused on the aero since adding the rear wing. I'd also damaged my front splitter, so it was an ideal opportunity to balance the front of the car and help reduce front end lift. I decided to make a twin canard setup which links into the front splitter. The splitter runs all the way back to the sub-frame and mounts to the chassis and front bumper. Roll on testing!


Rear diffuser
Following on from the front splitter I decided to build my own diffuser for the back of the FD. I always liked the RE Amemiya one I had with vortex and and bowtech generators, but I felt the car needed something more substantial to keep up with the rest of the aero.After numerous photoshops, sketches and cardboard engineering I settled on a multi fin design with large vortex centre fins. I kept the angle at a range so flow wouldn't separate, and designed it to work with the rear angles of the car and the exhaust for a one-off design. I finished the design in aluminium and HDPE with a blow over in black. Its securely fastened to the underside of the car using a number of bolts and metal brackets.


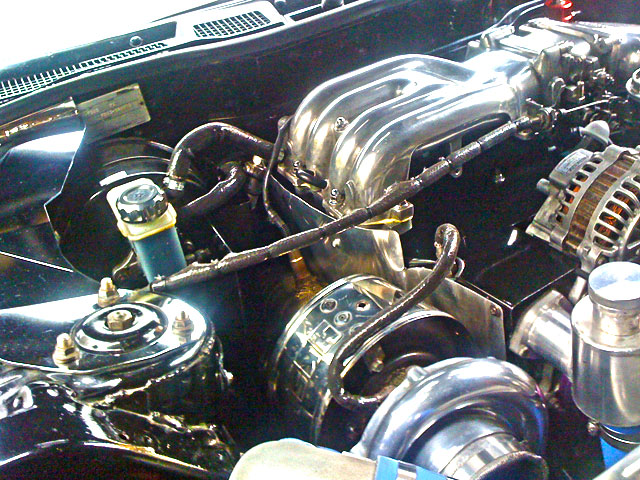
Black engine bay
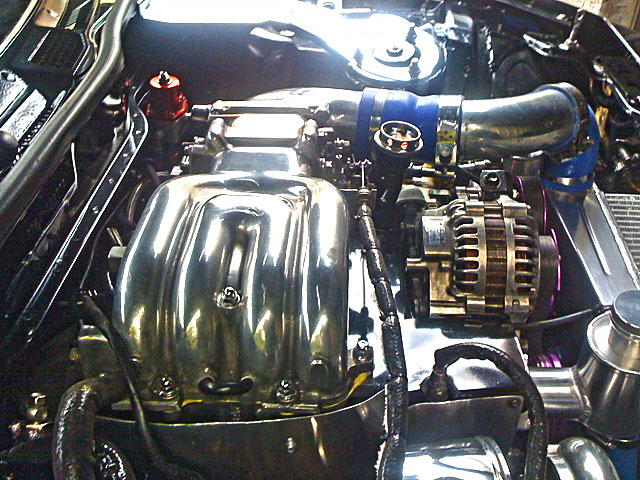
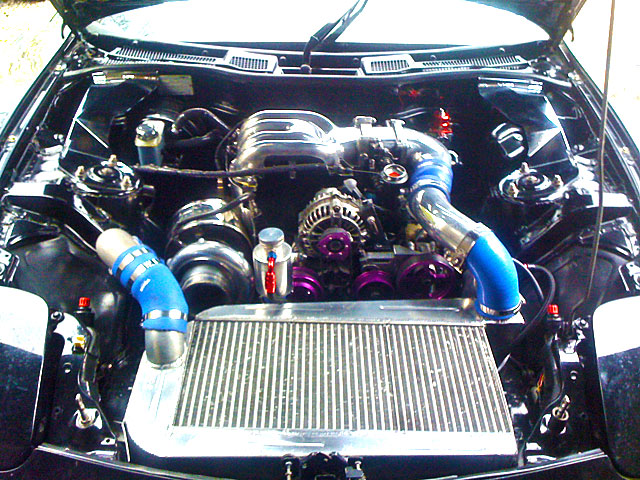
I’ve seen a few bays with black used and decided I’d do the same to complement the rest of the car. It really takes time stripping bits off, prepping and painting... then putting it back together without damaging it!I eventually got to a point I’m happy with it, although I’m not sure whether to paint the strut brace black too? I’m think to leave it polished since its useful to lean on and won't scratch as easily.

Varex back box
After a mapping session with Jaydee earlier in the year it was discovered my exhaust had a severe restriction at high revs caused by the Apexi valve closing itself! A fault of the spring softening with the heat.I spoke with Ed, who supplied a Varex exhaust, which had similar flow to my R-Magic but used a remote valve for silencing the exhaust, this one should not close itself under full flow.
The old exhaust was cut off and the new one welded on, much quieter! So it should help with getting on track.

Gearbox issues
Stripped down my gearbox to see what third looked like after I broke it, lots of splines in the pan… The gears have seen better days! Looks like thats a bin job then…
DM Motorsport rear two-piece brakes
Today I fitted my larger 2 piece disc upgrade which uses 330x20 mm discs (fromComp-Brake) with hats with brackets courtesy of the nice guys at DM motorsport. The main benefit of the larger discs is not only looks but a larger surface area with which to dissipate heat.I had a bit of trouble getting the original caliper bolts out, but thanks to a special set of sockets from Irwin I managed to get them out easily.
I also had to remove the original brake ducts for clearance as the lip would catch on the larger discs, I tried removing just the lip, but they felt a bit flimsy so I ditched them entirely. I cleaned up the calipers and hub while I was there with some wire brushes and a bit of polish. The brackets needed a little tweak to sit flush as the reverse of the FD hub has a little lip that needed removal. Once on I then assembled the discs with hats and bolted them along with the calipers all back together.
In all I'd say it took just a few hours and really looks much better compared to the stock brakes! Also the good news is the handbrake cable reached without needing any adjustment. Now all I need is to bed them in!
A few pics of the process:


Santa Pod visit
Had a great time at the Pod, if a bit hot - both in and out of the car!Cheers for the pics Gary Dickens.
Found I still had an oil leak on getting home from the pod as my back bumper had managed to pick up most of it!
So on Sunday I dropped the front subframe and redid the oil pan. I also found the oil drain from the turbo to the block wasn't sitting flush since it had warped!:confused: Will get that replaced then I should be back up and running again and ready for a map from Jaydee.
Next job is a heat shield for the downpipe to stop radiant heat cooking my gear box, transmission tunnel and me!


Internal swirl firewall
Since buying and fitting the swirl pot and external 044 pumps I've been really concerned if I ever suffered a fuel leak... as its right behind the driver!After a few cardboard mock ups I purchased some 5mm lexan sheet and aluminium angle to make arear firewall. I chose lexan since I wanted as much visibility as possible. I just need to get some rubber edging for it to fully seal.

Ignition rewire
One of the problems with the original loom is that the ignition circuit travels a very long path before it gets to the coils which results in a voltage drop and a weak spark.
Since I had the car in bits (again) I decided to strip back the ignition and ignitor loom and rewire them directly to the battery for a stronger spark and ditch the excessive cables. I probably removed a metres worth!

Esprit GT wing
Next up is the rear wing, with my custom mounts mounted on the outer edge along with the Esprit 1850mm carbon wing.

Running!
Engine all back in, started first time too!!
Aero modifications


I also openend up the rear quarters as well to match the fronts.
I've also got some new carbon goodies too, I'll get some pics up when I've mounted them!
Rebuild 2012
Well after getting my car back together after the winter I found it wasn't starting from cold very well, and when it did it would only start on one rotor! I was hoping it would just be a plug lead that was not seated but after cranking with the plugs out I found coolant. I did a quick champagne test and I also got many bubbles which concluded my water seals had gone or I had a warped plate. It would hold pressure when cold but as soon as it got warm I would get coolant in the front housing.I spoke with Jay who agreed the engine would need to come out for a rebuild so I was left with an empty bay for a couple of weeks whilst it was rebuilt. You can see my new front subframe in gold and the new coil relocation bracket I made whilst I could get in there!
I got the engine back a couple of weeks ago, it turns out the front housing was warped! So I got a new one for piece of mind and had it ported out to match the other housing, plus a bit extra on both for good measure!
So I'm almost there putting it all back together, will just need a tweak on the map since I've gone with a parallel fuel setup.


99 cluster and glove box heater controls
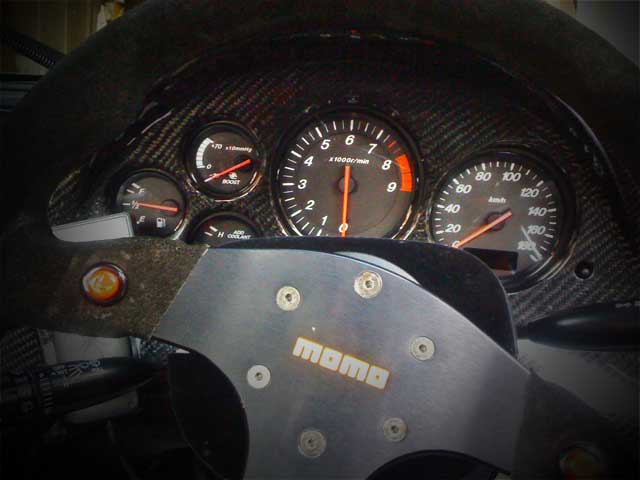
I spent the nice weather over the weekend finishing the install of my 99 spec gauge cluster and making up a panel for the glove box to house the heater and fan controls, which I'm pretty pleased with.With the sun out I decided it was time for a clean and polish since the car hasn't had one since last year and I've been busy doing all the other mods!


Hidden brake lines
Something thats always bothered me about the engine bay has been the unsightly brake and clutch lines that sit across the firewall. The routing meant the pipes get hot and the extra joints mean more failure points. So I set out to remove them and replace them with braided lines.Removal went well with no fluid on the paintwork and I was able route and make up the new lines without too much trouble. Took a bit of time to bleed out the air in the new lines but the pedal feels nice and firm.
New GT wing
Another year and a new GT wing!After having a Sard wing for sometime I thought I'd try something different, so I decided to go with a huge 1850mm Esprit wing as it had more depth than the Sard. I'm currently deciding whether to mount it centre (like the Revolution Time Attack car) or at the boot lid edges.
I'll post some better pics when its not raining!

Cusco RS LSD
I've had a Cusco RS LSD in the garage but never got around to installing it. With the subframe and arms being changed it seemed a perfect opportunity to install it. Filling the diff is an interesting mission, I ended up getting a small hand pump to fill it as a tube through the fuel pump cover just wouldn't work!The diff is currently set up as a 1.5 way with 80% lockup. I'll let you know how much of a learning curve it is compared to the stock torsen unit that I've been used to.

New sub-frames
While replacing the arms I decided to replace the front and rear sub frames with some new units which I painted light gold to match my wheels.
It was one of the worst jobs I've had to endure! Its been pretty cold and dark but I'll get some better pics when the sun comes back in the spring!


Suspension arms update
Purchased a few new goodies for the FD!First up were a set of Moonface Super lap front lower arms, these enable me to run low but still maintain the correct roll centre, essential for grip!
To compliment these I also got some Moonface Super Lap Tie rods which are angles to work with the front arms, goodbye bump steer!
Moving on to the rear I got an Ikeya Formula adjustable rear lower arm with trailing link, which like the front maintains the correct roll centre when lowering the car.
Finally I put Super Now Japan solid bushes in place of all the stock rubber bushes to really tighten the car up!


Mazda FD3S Time Attack